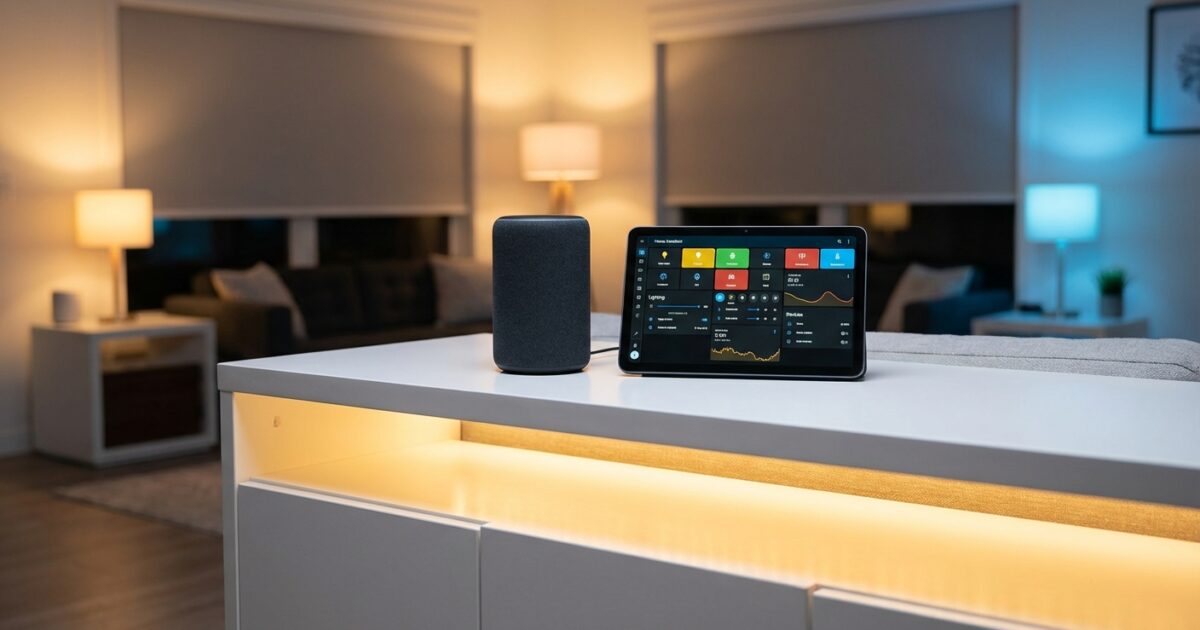
You’ve invested in smart home technology to make your life easier, but managing both Alexa and Home Assistant feels like running two competing systems. Your lights respond to voice commands through Alexa, while your advanced automations run through Home Assistant—and keeping everything synchronized becomes a daily frustration. This common scenario leaves many homeowners feeling overwhelmed by the very technology meant to simplify their lives.
The good news? You don’t need to choose between Alexa’s convenience and Home Assistant’s power. With the right integration approach, you can create a unified smart home experience that responds naturally to voice commands while maintaining sophisticated automation behind the scenes.
Understanding the Integration Landscape
Home Assistant serves as your smart home’s central brain, capable of connecting devices from different manufacturers and creating complex automations. Alexa, meanwhile, excels at voice recognition and user-friendly interactions. When properly integrated, Home Assistant handles the heavy lifting while Alexa provides the intuitive interface your family actually wants to use.
The key is establishing a connection that allows Alexa to control your Home Assistant entities without requiring you to maintain duplicate device configurations. Think of it as creating a bridge where Home Assistant remains your primary control system, but Alexa can access and command those same devices through voice.
Cloud-Based Integration: The Simplest Path Forward
For most homeowners, the cloud-based approach offers the best balance of functionality and ease of use. Home Assistant Cloud (Nabu Casa) provides a subscription service that handles the complex technical connections automatically.
Start by subscribing to Home Assistant Cloud through your Home Assistant interface. Navigate to Configuration, then Cloud, and follow the subscription process. Once activated, the Alexa integration becomes available immediately—no complex networking or security certificates required.
After enabling the cloud connection, you’ll configure which entities Alexa can access. This selective exposure is crucial: you don’t want every sensor and automation cluttering your Alexa device list. Focus on lights, switches, thermostats, and other devices your family will actually control by voice.
The beauty of this approach lies in its automatic synchronization. When you add new devices to Home Assistant, they become available to Alexa within minutes. Updates and changes propagate seamlessly, eliminating the dual-maintenance headache that plagues many smart home setups.
Local Integration: Maximum Control for Advanced Users
If you prefer keeping your smart home data local or want to avoid subscription costs, the emulated_hue integration offers an alternative path. This method tricks Alexa into thinking Home Assistant is a Philips Hue bridge, allowing direct local communication.
Enable emulated_hue by adding the component to your Home Assistant configuration file. You’ll need to specify which entities to expose and configure the integration’s network settings. While more complex initially, this approach provides faster response times and complete independence from cloud services.
However, local integration comes with limitations. You’ll lose access to advanced Alexa features like routines that combine Home Assistant devices with native Alexa functions. The setup also requires more technical knowledge and ongoing maintenance when network configurations change.
Strategic Entity Organization for Family Harmony
Success with Alexa integration depends heavily on thoughtful entity naming and organization. Your smart home might make perfect sense to you, but family members need intuitive, memorable names for voice control.
Establish consistent naming conventions that match how your family naturally speaks. Instead of technical names like “switch.kitchen_under_cabinet_led_strip,” use “kitchen counter lights.” Alexa responds better to natural language, and your family won’t need to memorize device databases.
Group related devices strategically. Create Alexa groups for “bedroom lights,” “living room,” or “downstairs” that correspond to how people think about spaces. This allows commands like “Alexa, turn off the bedroom” to control multiple devices simultaneously.
Consider creating dedicated “scenes” in Home Assistant that Alexa can trigger as single commands. Instead of asking family members to adjust multiple devices individually, they can say “Alexa, movie time” to dim lights, close blinds, and adjust the thermostat in one command.
Troubleshooting Integration Challenges
When devices stop responding to Alexa commands, start with the basics. Check that Home Assistant is running and accessible, then verify the integration status in your configuration. Most connectivity issues stem from network changes or Home Assistant updates that require re-authentication.
If specific devices aren’t appearing in Alexa, review your entity exposure settings. New devices often default to hidden status, requiring manual inclusion in the Alexa integration. Similarly, device name changes in Home Assistant may not propagate immediately—try asking Alexa to “discover devices” to refresh the connection.
Voice recognition problems usually indicate naming conflicts or overly complex device names. Alexa struggles with technical terminology and similar-sounding names. If “office lamp” and “office fan” cause confusion, try “desk lamp” and “ceiling fan” instead.
Network-related issues often manifest as delayed responses or intermittent connectivity. Ensure your Home Assistant server has a stable network connection and consider upgrading your router if you’re managing many smart devices. A congested network affects both local communication and cloud synchronization.
Alternative Solutions and Creative Workarounds
Sometimes the standard integration methods don’t fit your specific needs or technical setup. Third-party solutions like Haaska (Home Assistant Alexa Skill Adapter) offer middle-ground approaches with more customization options.
For households with mixed smart home platforms, consider using Home Assistant as a universal translator. Connect all your devices to Home Assistant first, then expose only the unified interface to Alexa. This approach works particularly well when you have devices from manufacturers who don’t play nicely together.
Node-RED integration provides another path for complex automation needs. You can create sophisticated workflows that respond to Alexa commands while maintaining complete control over the underlying logic. This approach requires more technical expertise but offers unlimited customization possibilities.
Some homeowners find success with webhook-based solutions that trigger Home Assistant automations through Alexa routines. While more complex to set up, this method allows integration of services that don’t traditionally work together.
Making Smart Homes Family-Friendly
Technical integration means nothing if family members won’t or can’t use the system effectively. Focus on creating voice commands that feel natural and responses that provide helpful feedback.
Train family members using consistent language patterns. Post a simple reference sheet near main living areas with common commands like “Alexa, goodnight” or “Alexa, I’m leaving.” Avoid overwhelming people with too many options initially—start with essential functions and expand gradually.
Configure meaningful response confirmations. Instead of generic “OK” responses, have Alexa confirm specific actions: “Kitchen lights are now dimmed to 30%” provides better feedback than silent execution.
Create backup manual controls for everything voice-activated. Smart switches should still function normally when pressed, and essential systems need fallback options when voice control fails. Technology should enhance your home, not create dependencies that frustrate daily life.
Consider implementing guest modes or temporary access codes for visitors unfamiliar with your smart home setup. Simple voice commands for basic functions like lights and temperature make guests comfortable without exposing advanced system controls.
Your Next Steps to Integration Success
Start your integration journey by auditing your current smart home devices and identifying which ones you actually want to control by voice. Focus on high-use items like main lighting, thermostats, and entertainment systems rather than every sensor and switch in your configuration.
Choose your integration method based on your technical comfort level and privacy preferences. Home Assistant Cloud offers the smoothest experience for most users, while local methods suit those prioritizing data privacy and network independence.
Begin with a small subset of devices to test your integration approach. Perfect the setup and naming conventions for one room before expanding system-wide. This incremental approach helps you identify potential issues while they’re still manageable.
Document your naming conventions and group structures as you build them. Future device additions will integrate more smoothly when you maintain consistent patterns. Share this documentation with family members who help manage the smart home system.
Schedule regular reviews of your voice command usage patterns. Remove rarely-used device exposures from Alexa to reduce clutter, and adjust groupings based on how your family actually uses the space. Your smart home should evolve with your lifestyle, not constrain it.