Few things are more frustrating than a door that refuses to latch properly. Whether it’s a bedroom door that won’t stay closed or a bathroom door that requires excessive force to shut, these issues can disrupt your daily routine and compromise your home’s functionality. The good news is that most interior door latching problems stem from a handful of common causes that you can diagnose and fix yourself.
Understanding why doors stop latching properly helps you tackle the problem systematically. Most issues develop gradually as your home settles, humidity levels change, or hardware wears over time. By following a logical troubleshooting process, you’ll identify the root cause and implement the right solution.
Common Causes of Door Latching Problems
Before diving into repairs, you need to understand what typically goes wrong. House settling ranks as the primary culprit behind door problems. As your home’s foundation settles and the frame shifts slightly, door frames can move out of alignment, creating gaps where none existed before.
Humidity fluctuations affect wood doors significantly. During humid months, wooden doors absorb moisture and expand, making them harder to close. Conversely, dry conditions cause wood to shrink, potentially creating gaps that prevent proper latching.
Worn or loose hinges allow doors to sag over time, shifting the door’s position relative to the strike plate. This misalignment prevents the latch from engaging properly with the strike plate opening.
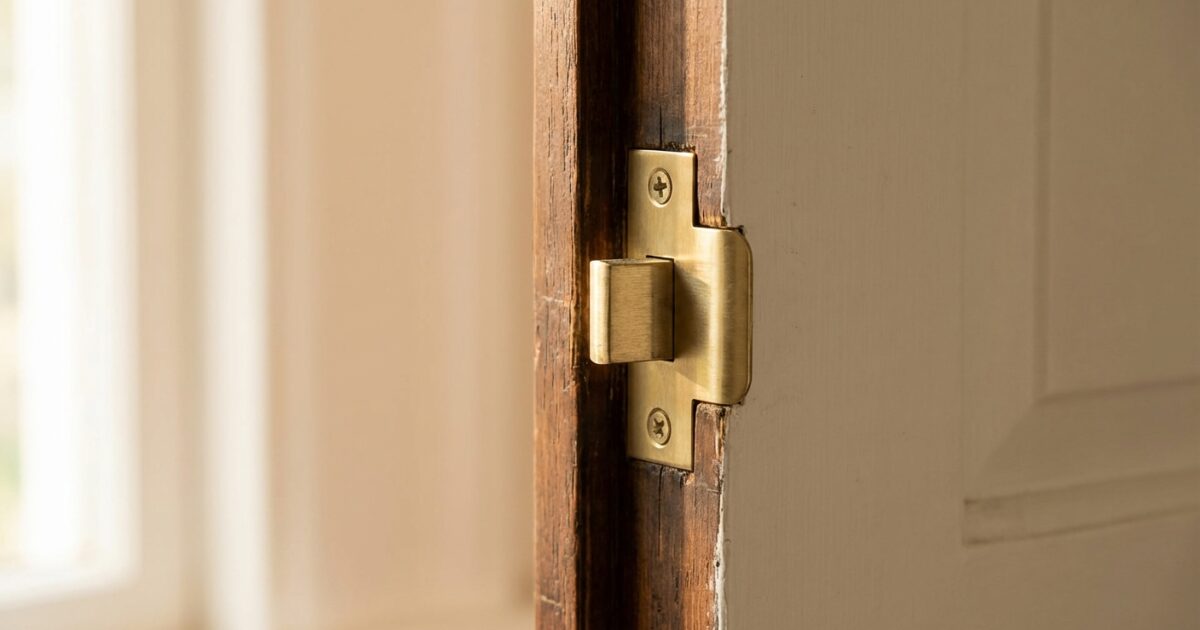
Misaligned strike plates occur when the metal plate surrounding the latch hole shifts position or when the door’s position changes relative to the frame. Even minor misalignment can prevent smooth latching.
Damaged door hardware includes worn latch mechanisms, bent strike plates, or loose door handles that no longer function smoothly.
Essential Tools for Door Repairs
Before starting your diagnosis, gather these basic tools:
- Phillips head and flathead screwdrivers
- Drill with bits
- Hammer
- Wood chisel set
- Level
- Pencil
- Measuring tape
- Sandpaper or wood file
- Lipstick or colored chalk
- Shims
Step-by-Step Troubleshooting Process
Visual Inspection
Start by examining the door while it’s closed. Look for uneven gaps around the door frame. A properly hung door maintains consistent spacing on all sides. Wider gaps at the top or bottom indicate sagging hinges, while gaps on one side suggest frame settling.
Open the door and inspect the hinge pins and screws. Loose screws allow hinges to shift, causing alignment problems. Check if hinge pins show excessive wear or if the hinges themselves appear bent or damaged.
Examine the strike plate area closely. Look for scratches, dents, or wear marks that indicate where the latch has been hitting. These marks reveal whether the latch is hitting above, below, or to the side of the strike plate opening.
The Lipstick Test
Apply lipstick or colored chalk to the latch bolt, then close the door gently. The colored mark left on the strike plate or door frame shows exactly where the latch is making contact. This simple test reveals whether you’re dealing with vertical or horizontal misalignment.
Checking Door Movement
With the door open, lift it slightly at the handle. If this eliminates the latching problem, your hinges are sagging and need adjustment or replacement. Similarly, if pushing the door up or down while closing helps it latch, you’ve confirmed vertical misalignment.
Fixing Hinge Problems
Sagging hinges are often the easiest problem to fix. Start by tightening all hinge screws with a screwdriver. If screws won’t tighten because the holes have enlarged, remove the screws and insert wooden toothpicks or matchsticks coated with wood glue into the holes. Once the glue dries, reinstall the screws for a secure grip.
For more severe sagging, you may need to replace the hinges entirely. Choose hinges that match the existing mortise cuts in your door and frame. When installing new hinges, ensure they’re perfectly plumb using a level.
If the door binds at the top when closing, the top hinge may be too deep in its mortise. Remove the hinge and place a thin cardboard shim behind it before reinstalling. Conversely, if the door binds at the bottom, shim the bottom hinge.
Adjusting Strike Plates
When the latch consistently hits the strike plate but won’t engage the opening, you need to reposition the strike plate. Use your lipstick test results to determine which direction to move it.
For minor adjustments, you can file the strike plate opening larger using a metal file. Work slowly and test frequently to avoid removing too much material.
For larger adjustments, you’ll need to relocate the entire strike plate. Remove the plate and its screws, then use wood filler to fill the existing screw holes and mortise. Once the filler dries, sand it smooth and mark the new position for the strike plate. Use a sharp chisel to create a new mortise, then install the strike plate in its new location.
When moving a strike plate significantly, you may need to fill the old latch hole in the door frame with wood filler and drill a new hole in the correct location.
Dealing with Door Frame Issues
Sometimes the problem lies with the door frame itself rather than the door or hardware. Frame settling can cause the frame to shift out of square, creating alignment problems that no amount of hardware adjustment will fix.
Check if your frame is square by measuring diagonally from corner to corner. If the measurements differ significantly, the frame has shifted. Minor frame adjustments can sometimes be made by carefully adjusting the door stops—the thin strips of wood that the door closes against.
For more severe frame problems, you may need to remove and reinstall the door trim, then use shims to square up the frame. This is more complex work that may warrant calling a professional carpenter.
When to Trim or Replace the Door
Sometimes the door itself is the problem. Doors that have warped, swollen from humidity, or been damaged may need trimming or replacement.
Minor trimming can address doors that bind against the frame. Use a plane or sandpaper to remove small amounts of material from the binding edge. Always remove material gradually and test frequently—you can’t put wood back once it’s removed.
For doors that have warped significantly or have damaged edges, replacement may be more cost-effective than extensive repairs. Modern pre-hung door units can simplify installation, though you’ll need to ensure the new unit fits your existing rough opening.
Preventive Maintenance Tips
Regular maintenance prevents many door problems from developing. Lubricate hinges annually with a few drops of lightweight oil to prevent binding and wear. Avoid over-lubricating, which attracts dirt and debris.
Tighten hardware screws periodically as part of your routine home maintenance. Loose screws allow components to shift and misalign over time.
Monitor humidity levels in your home, especially during seasonal transitions. Maintaining consistent humidity between 30-50% helps minimize wood movement that can affect door operation.
Address small problems quickly before they become major issues. A door that’s slightly difficult to close today may refuse to latch at all next month if the underlying cause isn’t addressed.
When to Call a Professional
While many door problems are well within the DIY realm, some situations require professional expertise. Call a contractor if you discover structural issues with the door frame, need to modify the rough opening significantly, or lack confidence in your ability to make precise measurements and cuts.
Electrical work associated with powered door hardware should always be left to qualified electricians. Similarly, if your door problem stems from foundation settling or other structural issues, consult appropriate specialists.
Most interior door latching problems have straightforward solutions that you can implement with basic tools and patience. By working systematically through the troubleshooting process and making careful adjustments, you’ll restore proper function to your doors and gain confidence in your home maintenance skills. Remember that small adjustments often solve big problems, so start with the simplest solutions before moving to more complex repairs.